Connecting to Neon Databases
Overview
Neon provides fully managed serverless PostgreSQL databases with branching, autoscaling, and bottomless storage. This guide will help you connect your Neon database to Outerbase.
Prerequisites
Before starting, make sure you have already:
- Signed up for a Neon account (If you haven't visit www.neon.tech you can start for free!)
- Created a postgres database within that account
- Set up access the correct access credentials for your Neon database (read-only or read/write)
- Created an Outerbase account

Step 1: Obtain Connection Details
- Log in to your Neon account.
- Navigate to your database instance.
- In the "Dashboard" tab, find the Connection Details section.
- Copy and paste the connection string (Make sure you click the copy button or open the eye so you copy your password and not a series of asterisks)
OR
You can copy each parameter individually by selecting that from the dropdown next to the connection string. You will need these:
- Host Name: This is the network address of your Neon Database instance.
- Port: The port number through which the database listens for connections. (This should be 5432)
- Username and Password: The credentials for accessing the database.
- Database Name: The specific database you want to connect to.
Step 2: Connect from Outerbase
With the necessary information in hand, configure your Outerbase application to connect to your Neon Database instance.
- Open your Outerbase application's configuration.
- Locate the database configuration section.
- Enter the Neon Database host name as the database host.
- Provide 5432 as the Port number.
- Use the username and password you set up for your Neon database.
- Specify the database name you want to connect to.
- Save the configuration changes.
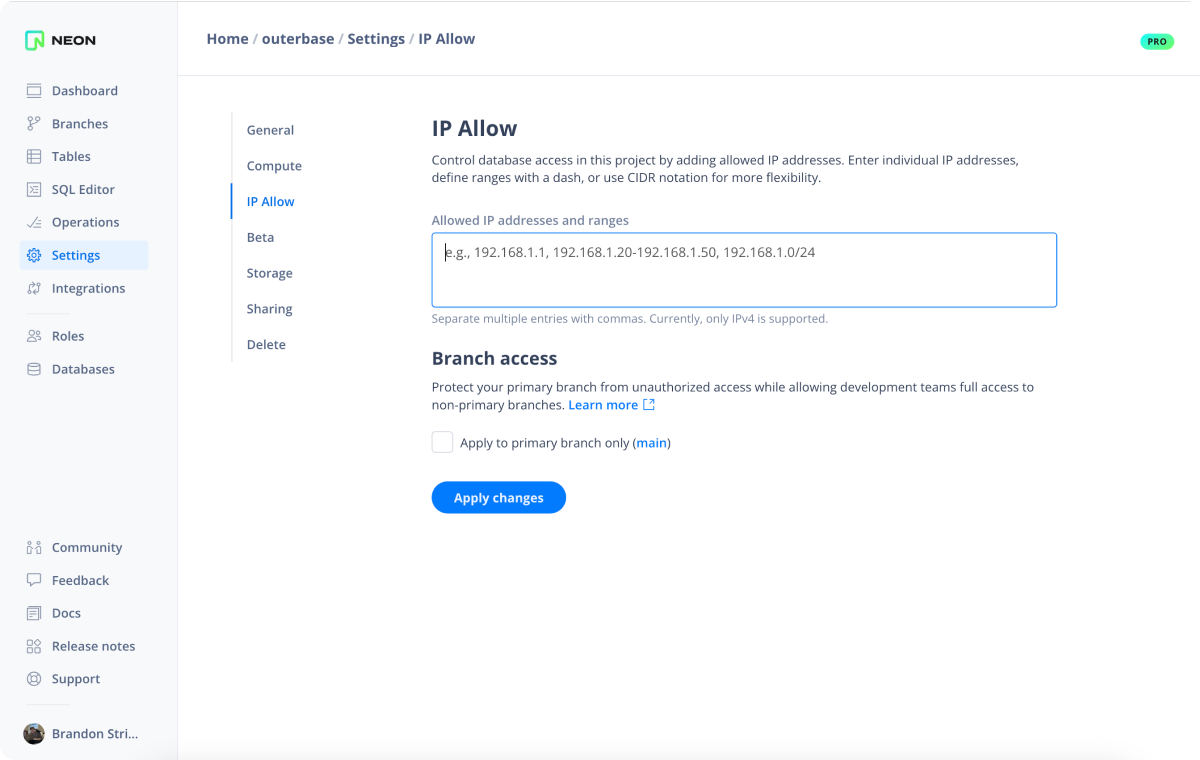
Step 3 (Optional): Allowlist Outerbase IPs
To further protect your database you can add Outerbase's IP address to your allowed IPs.
- Navigate to your Neon database settings
- Make sure you have IP Allow enabled (This is a Pro Feature)
- Copy these IP addresses:
44.205.184.11454.172.85.237 - Paste them into your Neon database settings.
Conclusion
You have successfully connected your Outerbase application to your Neon database. This integration allows your application to combine Neon's powerful serverless PostgreSQL capabilities, with Outerbase's easy-to-use and manage database GUI.
Remember to keep your credentials and connection details secure and regularly review and update your security settings.
For more detailed guidance and troubleshooting, consult the Neon documentation.